▂▂▂▂▂▂▂▂▂▂▂▂▂▂▂▂▂▂▂▂▂▂▂▂▂▂▂▂▂▂▂▂▂▂▂
ImagePrinter
▂▂▂▂▂▂▂▂▂▂▂▂▂▂▂▂▂▂▂▂▂▂▂▂▂▂▂▂▂▂▂▂▂▂▂
Want to paste any images into your server like the one below?
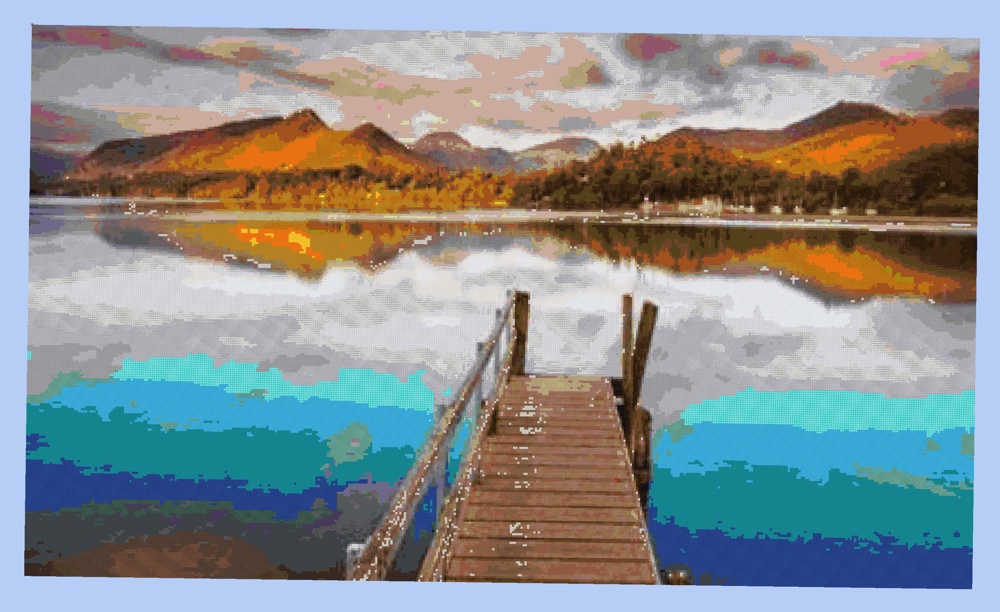
Here's How!
▂▂▂▂▂▂▂▂▂▂▂▂▂▂▂▂▂▂▂▂▂▂▂▂▂▂▂▂▂▂▂▂▂▂▂
What Tool Is This?
This is a tool for you to paste in any images you want from the internet
into your Minecraft server, using only Skript and a few add-ons.
(Required Addons are currently all available in CubedCraft)
▂▂▂▂▂▂▂▂▂▂▂▂▂▂▂▂▂▂▂▂▂▂▂▂▂▂▂▂▂▂▂▂▂▂▂
What Makes This Different
From Other Online Tools?
There are several tools on the internet that convert images into schematics that
can be pasted in-game using WorldEdit. Pasting schematic files is usable but however,
not efficient when it gets to tasks that require more flexibility.
For example, pasting a player's head when they join the server requires a complex system
that passes the image to converters, then stores it in WorldEdit schematic folder to load
the image into the server.
However, this task could be simplified and easily done with a system I made.
By typing in any image URL as input, it automatically converts any png/jpg image files
into an image formed by Minecraft blocks and paste into the server.
▂▂▂▂▂▂▂▂▂▂▂▂▂▂▂▂▂▂▂▂▂▂▂▂▂▂▂▂▂▂▂▂▂▂▂
How Difficult Is It To Use This Tool?
Don't tell me you never tried copying information from the internet
to turn in as your homework. To set up this system correctly and use it,
all you need to know is how to copy-paste.
▂▂▂▂▂▂▂▂▂▂▂▂▂▂▂▂▂▂▂▂▂▂▂▂▂▂▂▂▂▂▂▂▂▂▂
Server Plugin Requirements
To have this system function correctly, you need to install
Skript, skQuery, and skript-json in your server.
▂▂▂▂▂▂▂▂▂▂▂▂▂▂▂▂▂▂▂▂▂▂▂▂▂▂▂▂▂▂▂▂▂▂▂
Installation Guide
▂▂▂▂▂▂▂▂▂▂▂▂▂▂▂▂▂▂▂▂▂▂▂▂▂▂▂▂▂▂▂▂▂▂▂
Step 1: Install Plugins
This system requires few plugins to function,
required plugins are listed in Server Plugin Requirements above.
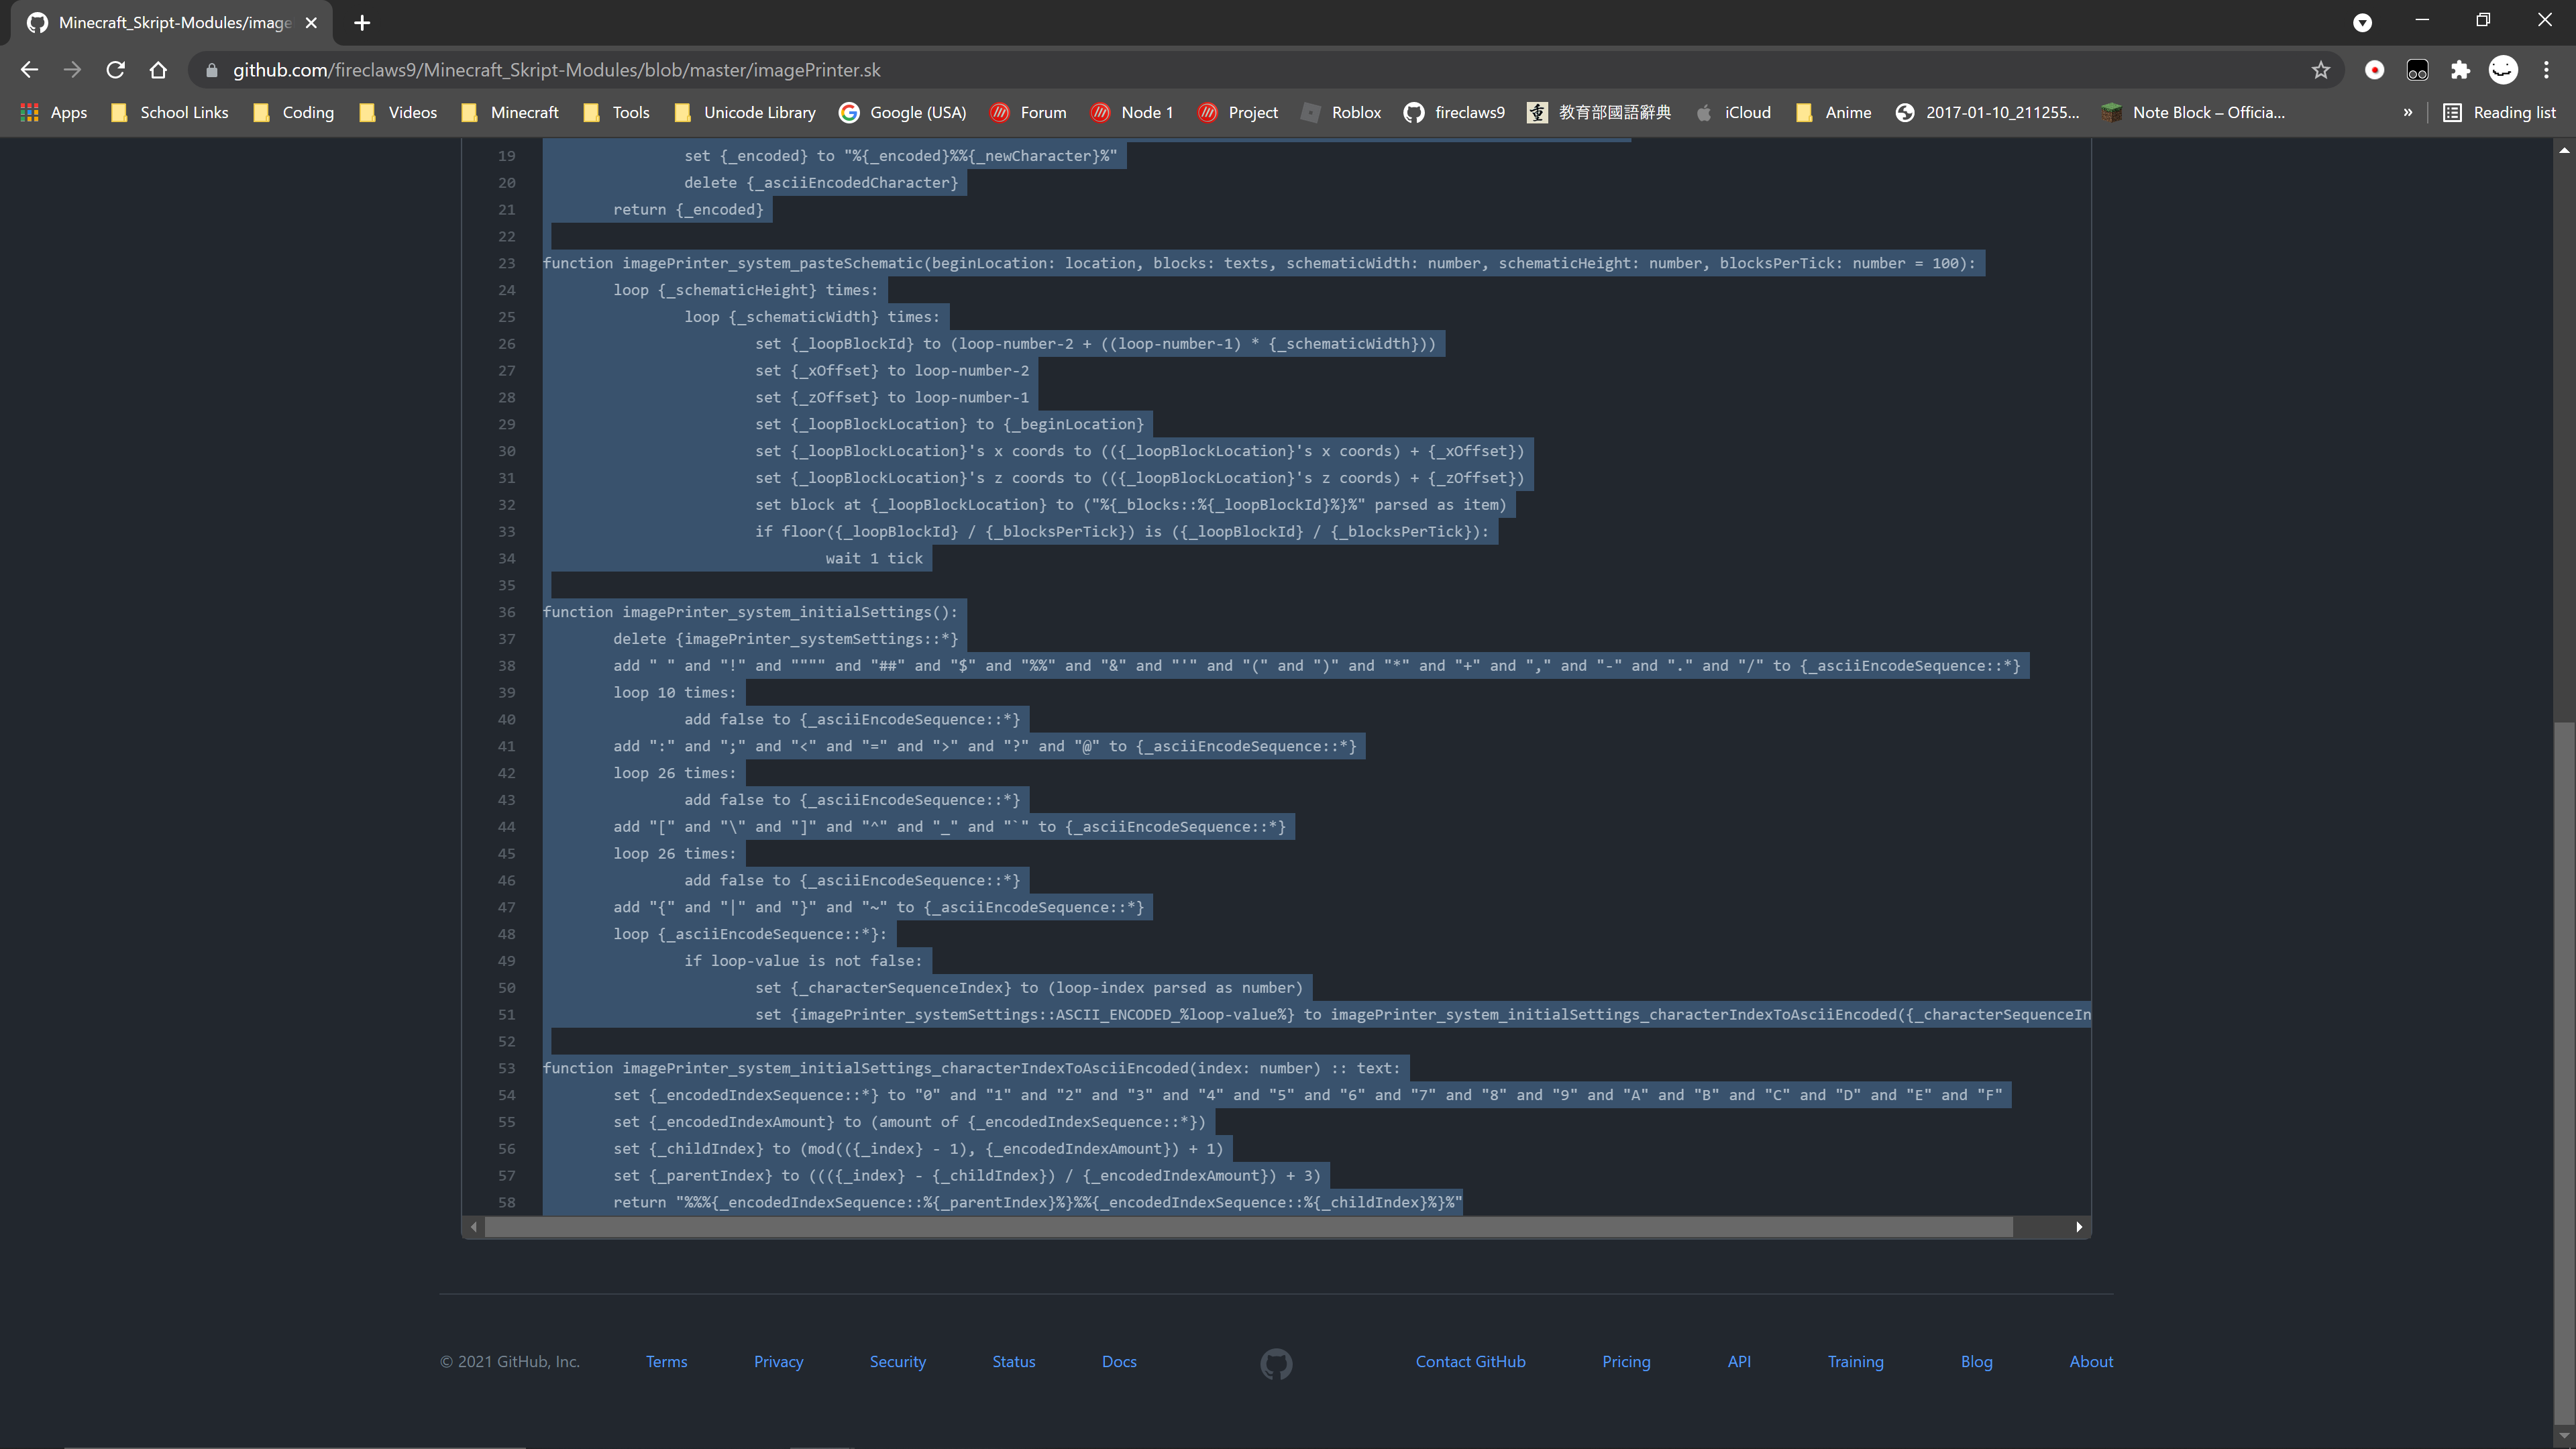
Step 2: Visit Source Code
Click [HERE] or manually paste the link
https://github.com/fireclaws9/Minecraft_Skript-Modules/blob/master/imagePrinter.sk
into your internet browser.
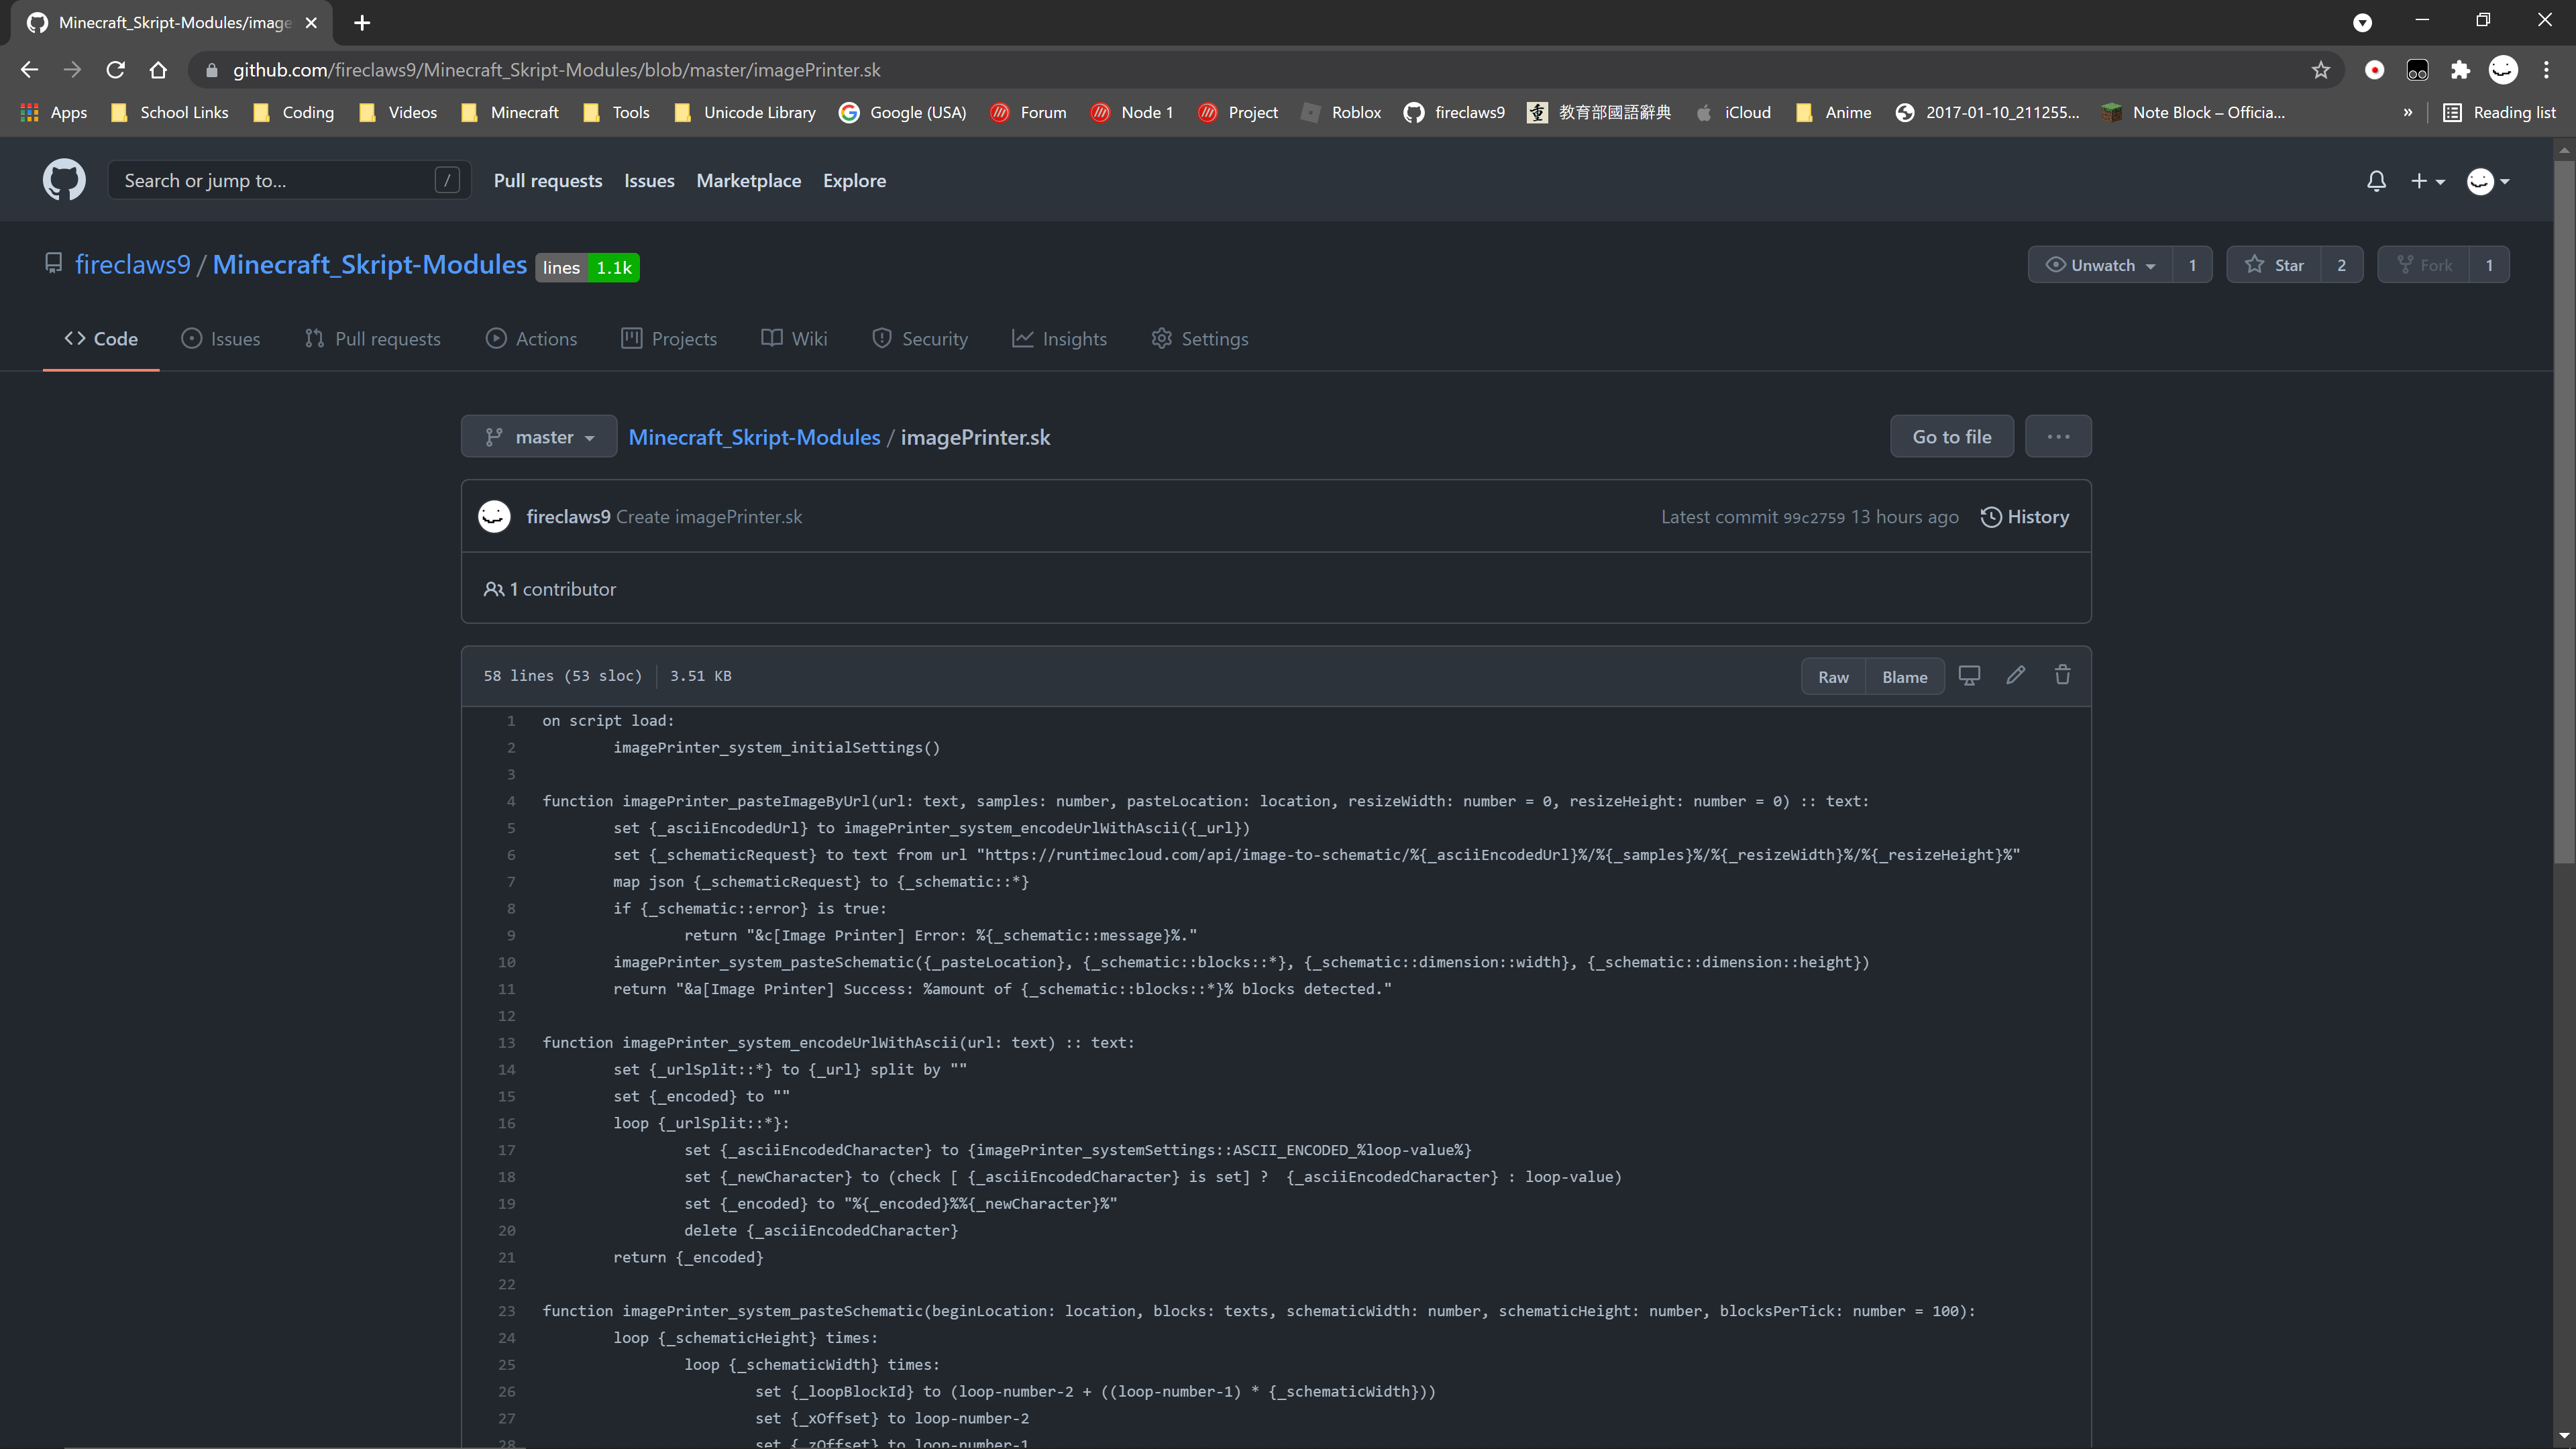
Step 3: Copy Paste Source Code
Select the source code and copy it using [CTRL + C].
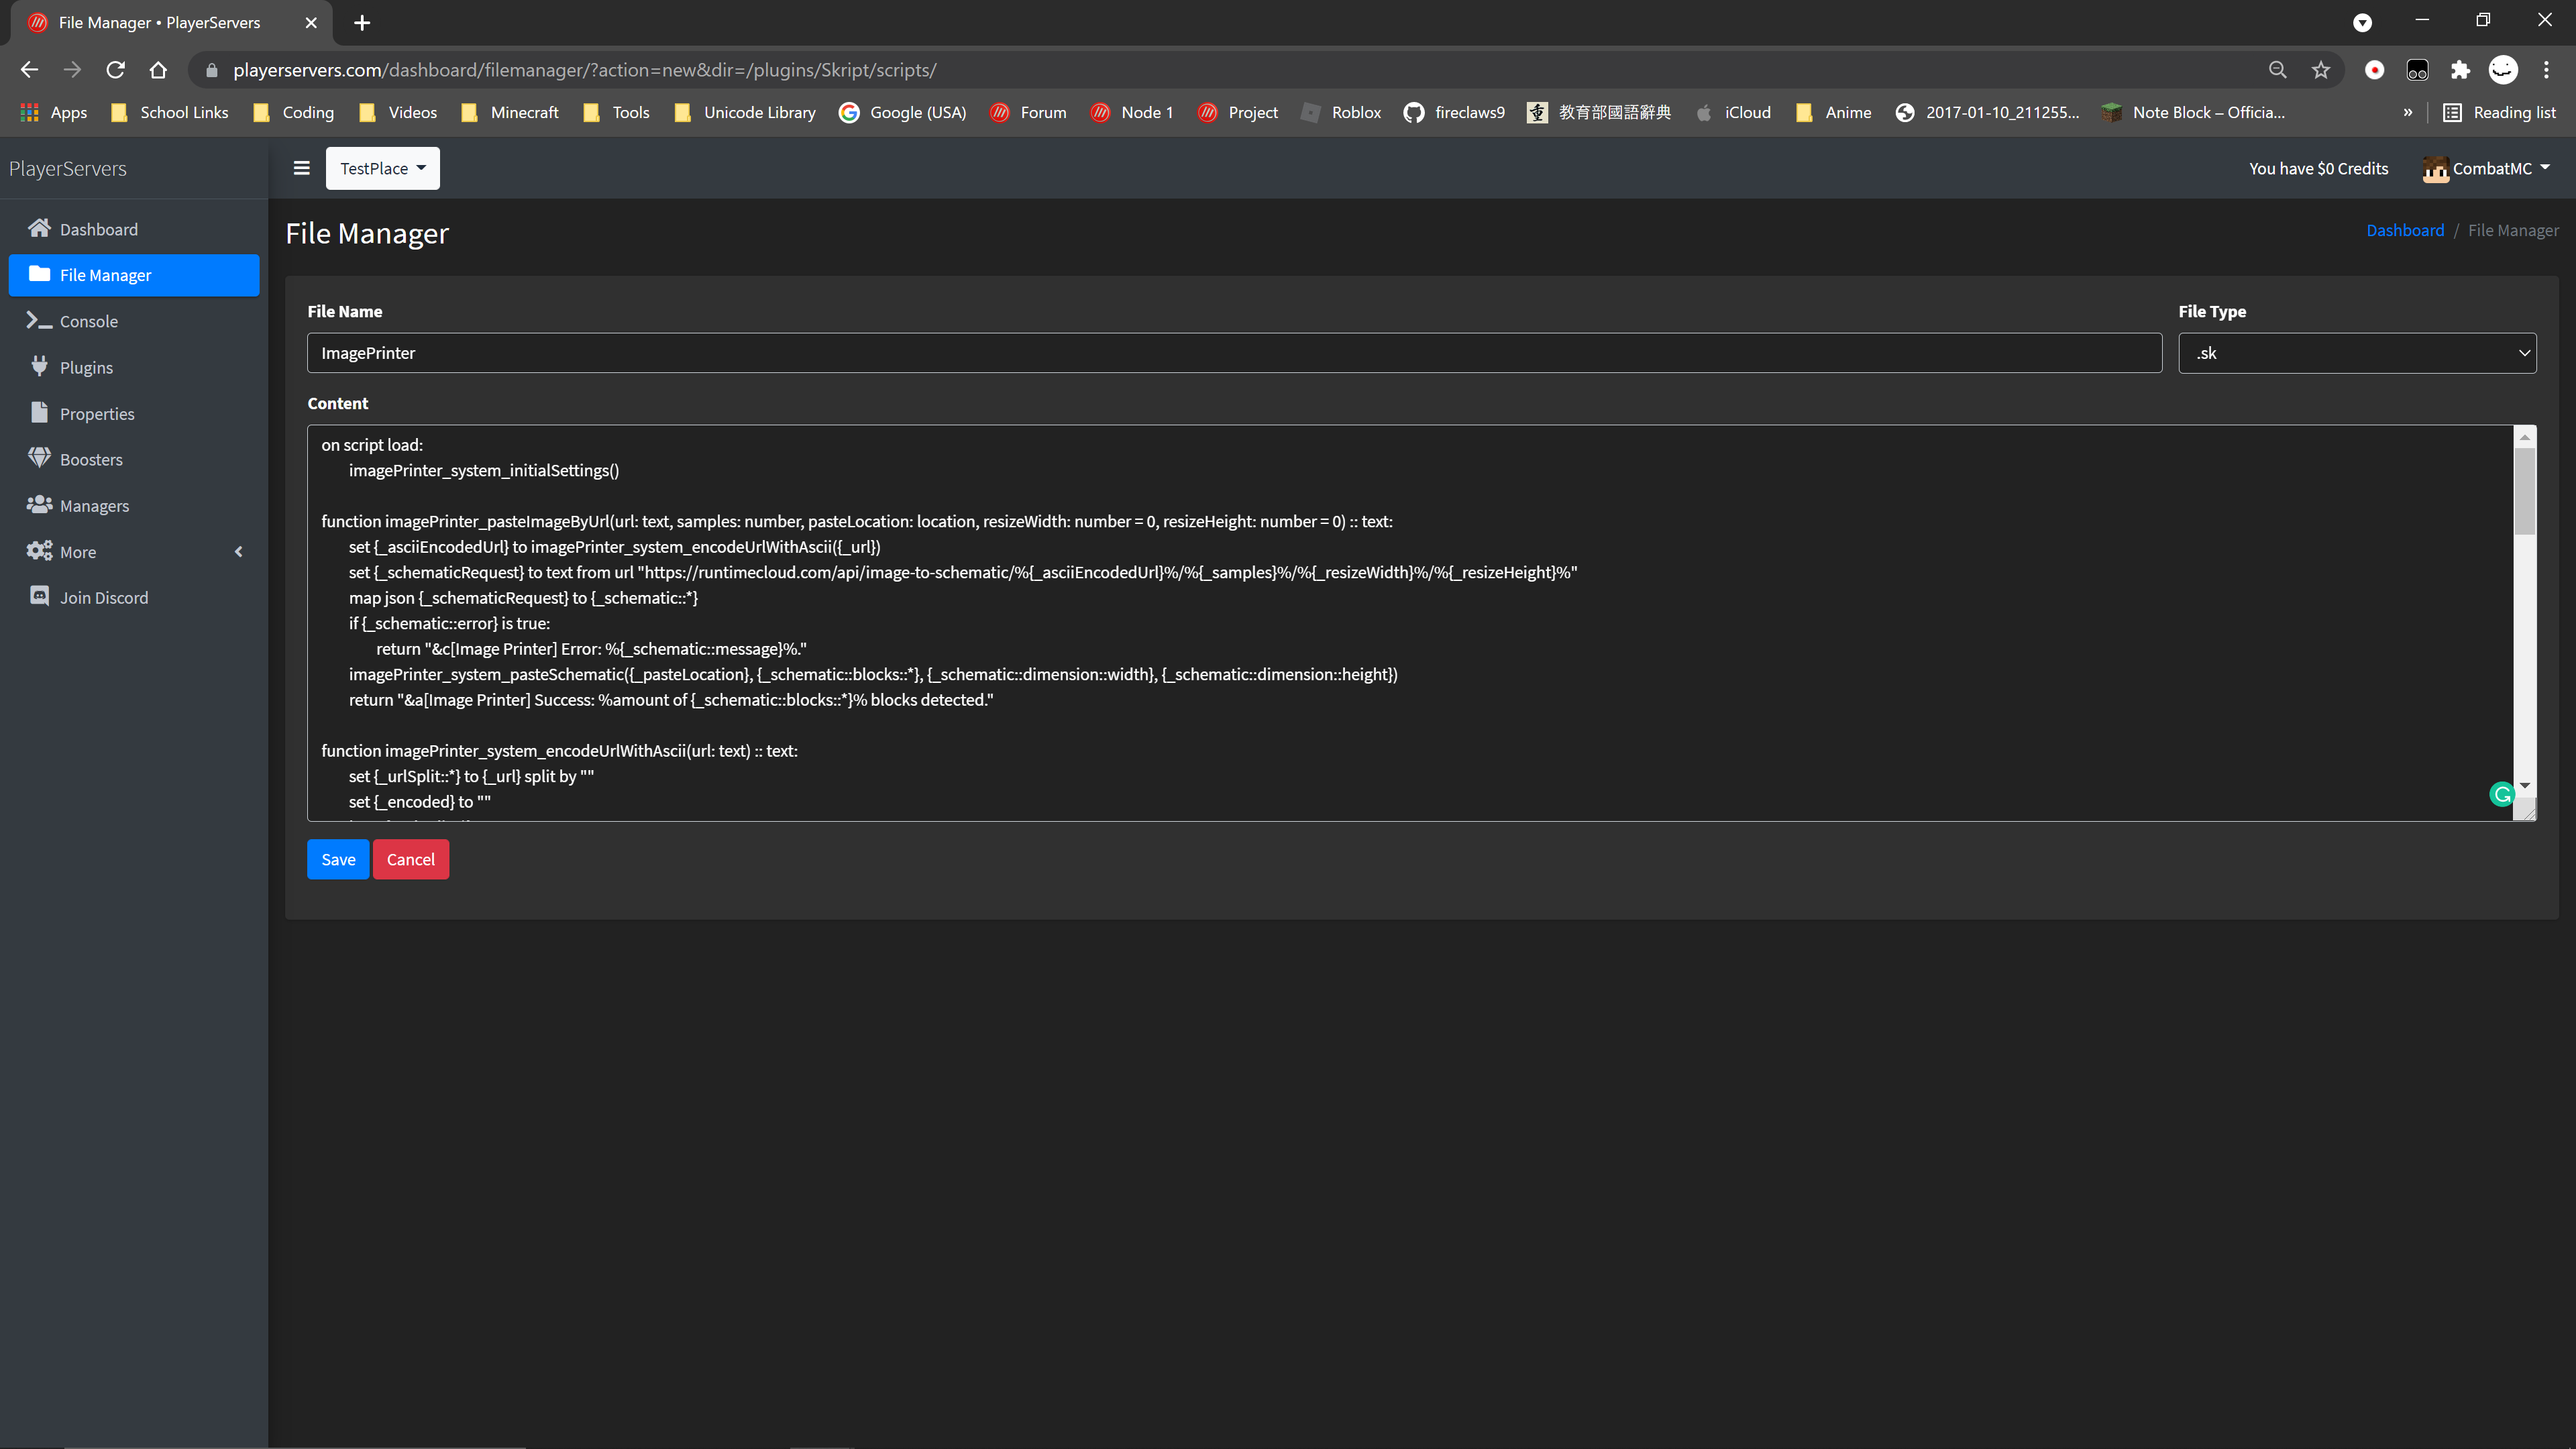
Step 4: Paste Into Server Scripts Folder
Go to directory plugins/Skript/scripts and click on
[ + New File] button located on the top right corner of your screen.
After you entered the file editing page, fill in the following fields and click [SAVE].
File Name:
ImagePrinter
File Type:
.sk
Contents:
(Paste in the source code you copied in Step #3 with [CTRL + V])
Step 5: Enabling Script
Join the server with your Minecraft Client and type
the command /sk reload scripts.
![]()
Step 6: DONE!
After you execute the command and the server responds with
[Skript] Successfully reloaded all scripts.
then congratulation, you have successfully installed the script.
How To Use It?
▂▂▂▂▂▂▂▂▂▂▂▂▂▂▂▂▂▂▂▂▂▂▂▂▂▂▂▂▂▂▂▂▂▂▂
After you installed the script, you have two options
to use this system.
Option 1: The Easy Way
As mentioned above, you don't need to know
what the script does to use this system.
If you don't know anything about using Skript
or you lazy to know, paste this script inside your scripts folder
just like Installation Guide Step #4 and #5 but instead, name the file
"ImagePrinterCommand" this time.
command /paste [<text>] [<text>] [<text>] [<text>]:
	trigger:
		if executor is not a op:
			send "&cYou are not allowed to use this command!" to executor
			stop
		if arg 1 or arg 2 is not set:
			send "&cUsage: /paste <image_link> <samples> [<resize_width> <resize_height>]" to executor
			stop
		set {_url} to (arg 1)
		set {_samples} to floor((arg 2 parsed as number))
		if {_samples} is not set:
			send "&cUsage: /paste <image_link> <samples> [<resize_width> <resize_height>]" to executor
			stop
		else if {_samples} <= 0:
			send "&cInvalid Samples Amount." to executor
			stop
		if arg 3 and arg 4 is set:
			set {_width} to floor((arg 3 parsed as number))
			set {_height} to floor((arg 4 parsed as number))
		if {_width} is not set:
			set {_width} to 0
		else if {_width} <= 0:
			send "&cInvalid Resize Width." to executor
			stop
		if {_height} is not set:
			set {_height} to 0
		else if {_height} <= 0:
			send "&cInvalid Resize Height." to executor
			stop
		set {_response} to imagePrinter_pasteImageByUrl({_url}, {_samples}, (executor's location), {_width}, {_height})
		send "%{_response}%" to executor

# These two lines are added to get around CubedCraft Forum's bug, keeping or removing this does not affect the function of this script.
# </resize_height></resize_width></samples></image_link></resize_height></resize_width></samples></image_link></text></text></text></text>
After you installed the script and enabled it in-game,
use the command
/paste [Image URL] [Color Samples] [Optional Resize Width] [Optional Resize Height]
to paste images into your server.
[Command Parameters Description Below]
Image URL:
The URL address to the image you want to paste.
Color Samples:
How many colors to extract from the image,
if you still confused by what this field is just type
1000000 in the field.
Optional Resize Width & Optional Resize Height:
If you want to resize the image to a specific size,
type this field in numbers which represent pixels
for the width and height of the image.
Option 2: The Hard Way
The source code is designed to be used as a backend API,
which allows script coders to paste images at a specific location
by executing the following function from other scripts.
imagePrinter_pasteImageByUrl( IMAGE_URL , COLOR_SAMPLES , PASTE_LOCATION , RESIZE_WIDTH [@NULLABLE], RESIZE_HEIGHT [@NULLABLE])
After executing the function, it responds with a text object
which sends out debug information (ERRORS),
you can handle the response by setting a local variable to it.
For Example:
command /printMyFace:
	trigger:

		set {_playerUuid} to (executor's uuid)
		replace all "-" with "" in {_playerUuid}
		# As the avator api requires simplified uuid, removing "-" from player's uuid

		set {_response} to imagePrinter_pasteImageByUrl("https://cravatar.eu/helmavatar/%{_playerUuid}%/8.png", 64, (executor's location), 8, 8)
		# Pasting the image from api with 64 color samples, resizing to 8x8 pixels at command executor's location
		# (As the avator api is already returning 8x8 pixels image, the resize parameters at the end could be removed, in this case it's just for showcase)

		send "%{_response}%" to executor
		# Send feedback to command executor for example errors